Appearance
List of All iOS Permissions
Location
Info.plist
The first time you make an authorization request, the system displays an alert asking the person to grant or deny the request. The alert includes a usage description string that explains why you want access to location data. You provide this string in your app’s Info.plist file and use it to inform people about how your app uses location data.
| key | Name | Required when: |
|---|---|---|
| NSLocationWhenInUseUsageDescription(iOS 11.0+) | Privacy - Location When In Use Usage Description | Use this key if your iOS app accesses location information only when running in the foreground. |
| NSLocationAlwaysAndWhenInUseUsageDescription(iOS 11.0+) | Privacy - Location Always and When In Use Usage Description | Use this key if your iOS app accesses location information while running in the background.. |
| NSLocationUsageDescription (macOS 10.14+) | Privacy - Location Usage Description | Use this key in a macOS app that accesses the user’s location information. |
| NSLocationAlwaysUsageDescription(Deprecated) | Privacy - Location Always Usage Description | Use this key if your iOS app accesses location information in the background, and you deploy to a target earlier than iOS 11. |
For instance: 
WARNING
Add all usage description keys to your app’s Info.plist file before you make any authorization requests.
Authorization requests fail immediately (without permission popup)if the required keys aren’t present.
Request Location Permission
- You can get your app’s current authorization from the authorizationStatus property of your CLLocationManager object.
- A newly configured CLLocationManager object also reports your app’s current authorization status to its delegate’s locationManagerDidChangeAuthorization(_:) method automatically.
- When the current status is CLAuthorizationStatus.notDetermined, you can request authorization by calling CLLocationManager object's requestWhenInUseAuthorization() or requestAlwaysAuthorization() method.
swift
import CoreLocation

func locationManagerDidChangeAuthorization(_ manager: CLLocationManager) {
    switch manager.authorizationStatus {
    case .authorizedWhenInUse:  // Location services are available.
        enableLocationFeatures()
        break

    case .restricted, .denied:  // Location services currently unavailable.
        disableLocationFeatures()
        break

    case .notDetermined:        // Authorization not determined yet.
        manager.requestWhenInUseAuthorization()
        //manager.requestAlwaysAuthorization()
        break

    default:
        break
    }
}- If the authorizationStatus is denied, you can only guide user to open it on the system settings page.
swift
if let settingsURL = URL(string: UIApplication.openSettingsURLString) {
    UIApplication.shared.open(settingsURL, options: [:], completionHandler: nil)
}
Notifications
Explicitly request notifications authorization
- Get the shared UNUserNotificationCenter instance and call its requestAuthorization(options:completionHandler:) method.
- Specify all of the interaction types that your app employs, for example:
.alert,.sound,.badge. - The first time your app makes this authorization request, the system prompts the person to grant or deny the request and records that response. Subsequent authorization requests don’t prompt the person.
swift
import UserNotifications

let center = UNUserNotificationCenter.current()

do {
    try await center.requestAuthorization(options: [.alert, .sound, .badge])
} catch {
    // Handle the error here.
}
Reuqest provisional authorization to send trial notifications
You can add provisional option to request provision authorization when requesting notifications permission.
swift
import UserNotifications

let center = UNUserNotificationCenter.current()do {
    try await center.requestAuthorization(options: [.alert, .sound, .badge, .provisional])
} catch {
    // Handle errors that may occur during requestAuthorization.
}
The first time you call this method, it doesn't prompt the person for permission, instead, it automatically grants authoriation, and the authorization status is UNAuthorizationStatus.provisional.
When the user receive a notification,it will be a provisional notification. The system delivers provisional notifications quietly - they don't alert or appear on the lock screen. Instead, they only appear in the notification center's history and include
Keep...andTurn off...buttons.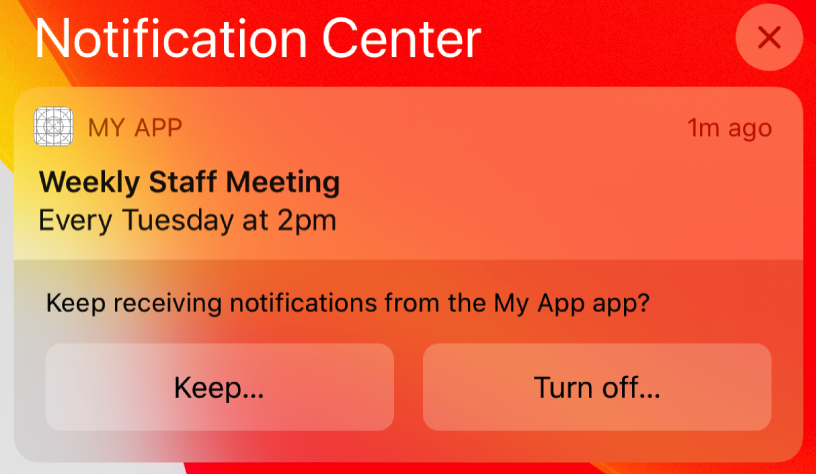
If users press the
Keep...button, the system prompts them to choose between two options:Deliver ImmediatelyorScheduled Summary.- Deliver Immediately authorises your app to send notifications, but without alert, sound or badge permissions. The system will deliver future notification quietly and your notifications only appears in the notificaiton center history.
- Deliver in Scheduled Summary only appear if the person has
Scheduled Summarytoggled On in Settings.
If users press the
Turn off...button, the system confirms the selection before denying your app authorization to send additional notifications.
Camera & Microphone
In iOS and macOS 10.14 and later, the user must explicitly grant permission for each app to access the camera and microphone.
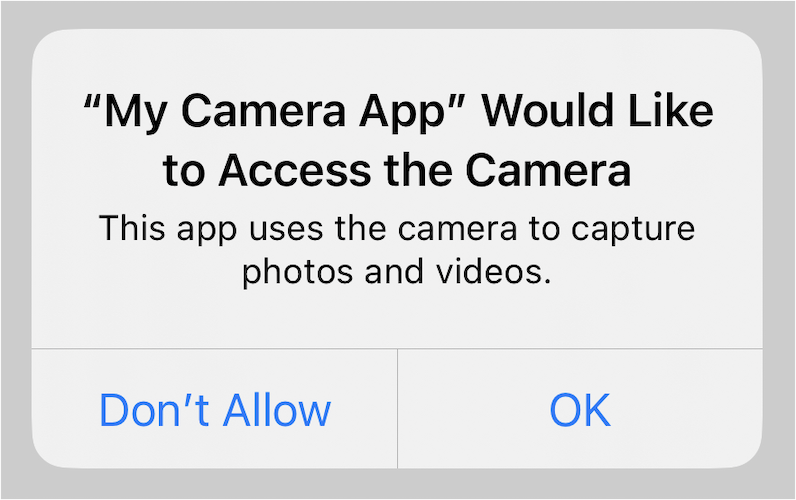
Before your app can use a capture device for the first time, the system presents an alert with an app-specific message that you specify, to ask the user to grant your app access to the capture device.
The user can change permission settings for your app in Settings > Privacy in iOS and in System Preferences > Security & Privacy in macOS.
Info.plist
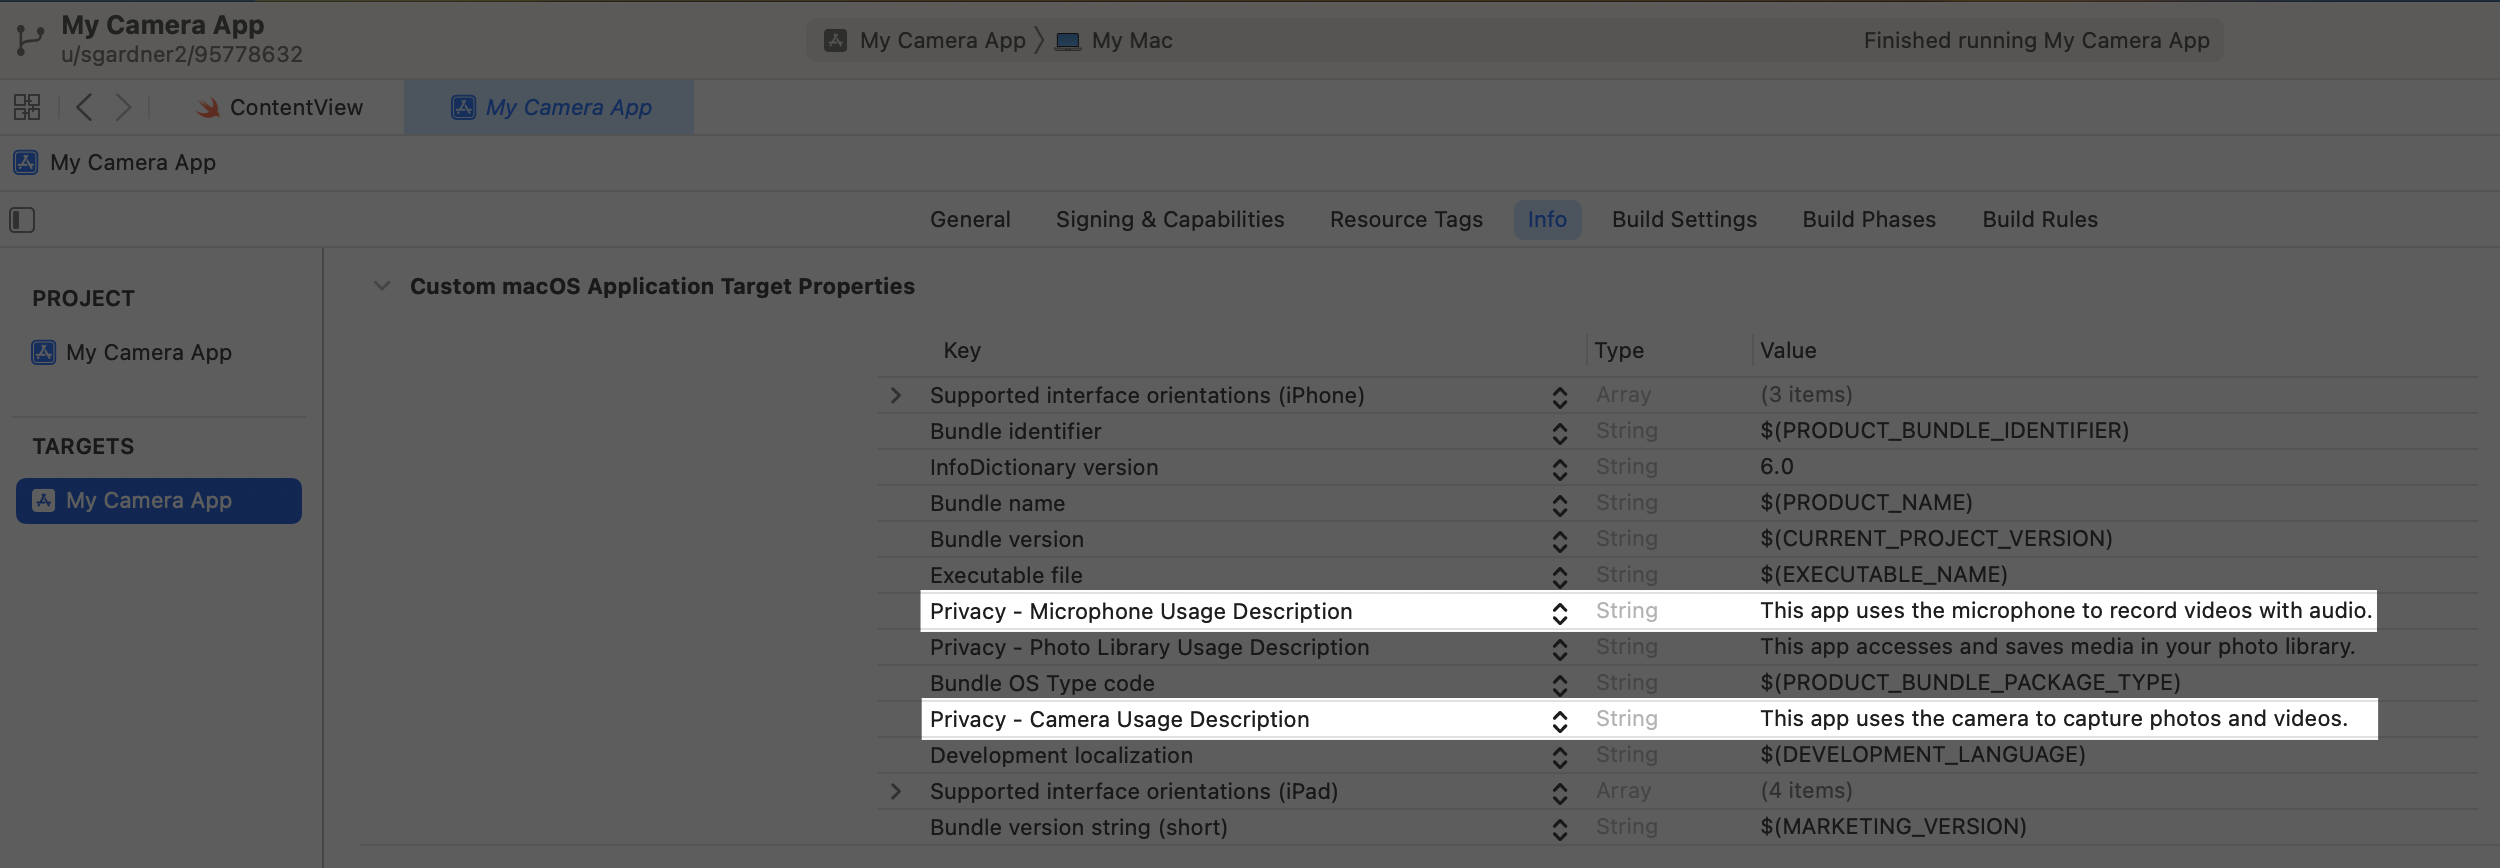
The system requires that your app provides static messages to display to the user when the system asks for permission to access the camera or microphone:
| Usage key | Required when: |
|---|---|
| NSCameraUsageDescription | The app requests to use device cameras. |
| NSMicrophoneUsageDescription | The app requests to use device microphones. |
WARNING
If an application attempts to access any of the device’s cameras or microphones without a corresponding purpose string, the app exits.
Verify and request authorization for capture
- Always test the AVCaptureDevice authorizationStatus(for:) method before setting up a capture session.
- If the user hasn’t granted or denied capture permission, the authorization status is AVAuthorizationStatus.notDetermined.
- In this case, use the requestAccess(for:completionHandler:) method to tell the system to prompt the user.
swift
import AVFoundation

var isAuthorized: Bool {
    get async {
        let status = AVCaptureDevice.authorizationStatus(for: .video)

        // Determine if the user previously authorized camera access.
        var isAuthorized = status == .authorized

        // If the system hasn't determined the user's authorization status,
        // explicitly prompt them for approval.
        if status == .notDetermined {
            isAuthorized = await AVCaptureDevice.requestAccess(for: .video)
        }

        return isAuthorized
    }
}- Calling requestAccess(for:completionHandler:) method with a media type of
audiois equivalent to calling the requestRecordPermission(_:) method on AVAudioSession.
swift
import AVFoundation

// Request permission to record.
AVAudioSession.sharedInstance().requestRecordPermission { granted in
    if granted {
        // The user granted access. Present recording interface.
    } else {
        // Present message to user indicating that recording
        // can't be performed until they change their preference
        // under Settings -> Privacy -> Microphone
    }
}- The requestRecordPermission(_:) method of AVAudioSession has been deprecated since iOS 17, we can use requestRecordPermission(completionHandler:) on AVAudioApplication instead.
swift
import AVFoundation

// Request permission to record.
if await AVAudioApplication.requestRecordPermission() {
    // The user grants access. Present recording interface.
} else {
    // The user denies access. Present a message that indicates
    // that they can change their permission settings in the
    // Privacy & Security section of the Settings app.
}
PhotoLibrary
A user’s photos and videos are some of the most personal and private data they store on their devices. Due to built-in privacy protections, an app may only access the user’s Photos library if they explicitly authorize it to do so.
Use PHPickerViewController without authorization.
If your app only need read-only access to retrieve images, the simplest way is to use PHPickerViewController to access the Photos library.
PHPickerViewController is a new picker that replaces UIImagePickerController. It supports search and multiple selection of photos and videos, and provides fluid zooming of content.
Because the system manages its life cycle in a separate process, it’s private by default. The user doesn’t need to explicitly authorize your app to select photos, which results in a simpler and more streamlined user experience.
Info.plist
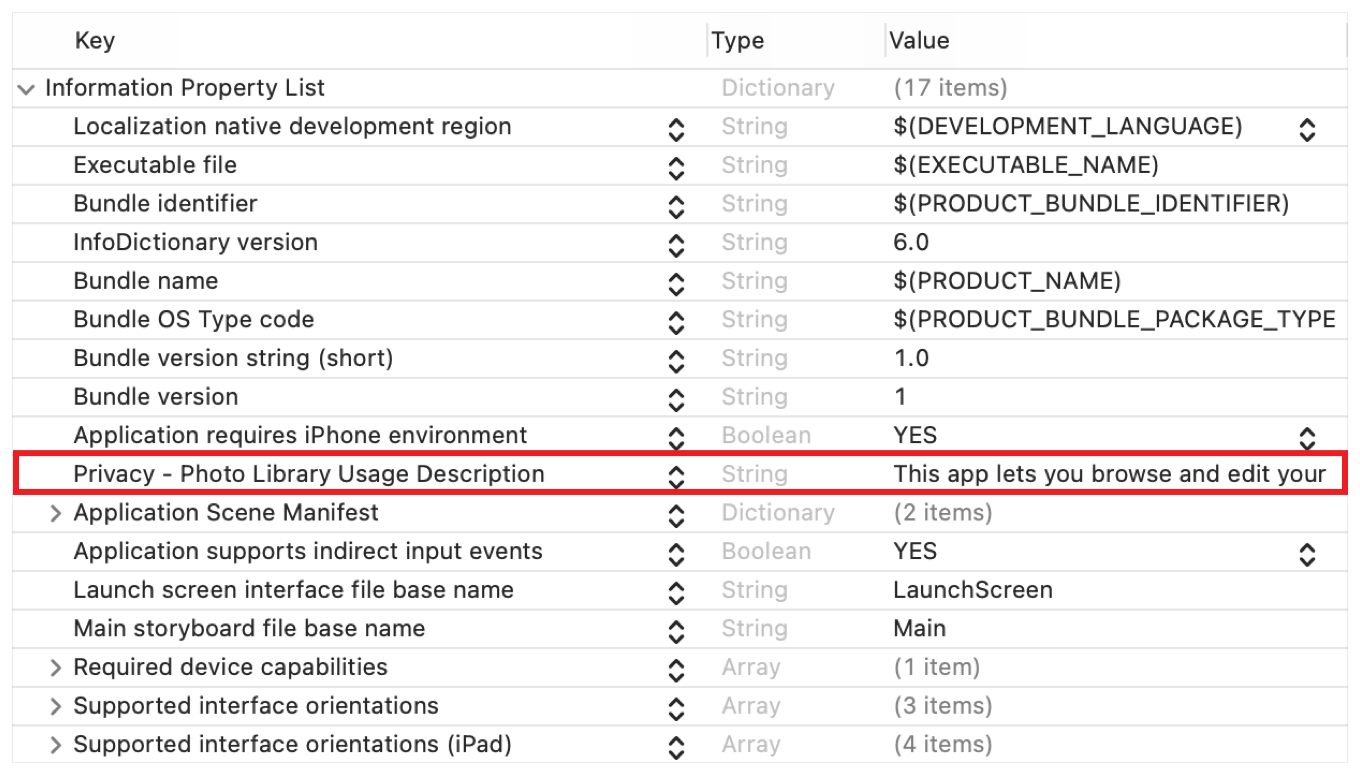
If your app requires PhotoKit’s advanced features, like retrieving assets and collections, or updating the library, the user must explicitly authorize it to access those features. Provide a localizable message in your Info.plist file that describes how your app interacts with the Photos library.
| Usage key | Required when: |
|---|---|
| NSPhotoLibraryAddUsageDescription | If your app only adds to the library. |
| NSPhotoLibraryUsageDescription | For all other cases. |
WARNING
Attempting to access the Photos library without a valid usage description causes your app to crash.
Determine and Request PhotoLibrary Authorization
To determine if the user has already authorized your app to access the library, query PHPhotoLibrary to check your app’s current authorization status.
swift
import Photos
// Check the app's authorization status (either read/write or add-only access).
let readWriteStatus = PHPhotoLibrary.authorizationStatus(for: .readWrite)
A status value of PHAuthorizationStatus.notDetermined indicates the user hasn’t yet authorized your app for access.
The first time your app performs an operation that requires authorization, the system automatically and asynchronously prompts the user for it.
You may also programmatically request authorization, which lets you control the timing of the prompt and determine the user’s response.
swift
import Photos
// Request read-write access to the user's photo library.
PHPhotoLibrary.requestAuthorization(for: .readWrite) { status in
    switch status {
    case .notDetermined:
        // The user hasn't determined this app's access.
    case .restricted:
        // The system restricted this app's access.
    case .denied:
        // The user explicitly denied this app's access.
    case .authorized:
        // The user authorized this app to access Photos data.
    case .limited:
        // The user authorized this app for limited Photos access.
    @unknown default:
        fatalError()
    }
}
Work with the Limited Library
Starting in iOS 14, PhotoKit adds the limited Photos library, which lets users select specific assets and resources to share with an app.
When the app requests authorization, the system prompts the user with a dialog like the one shown below.
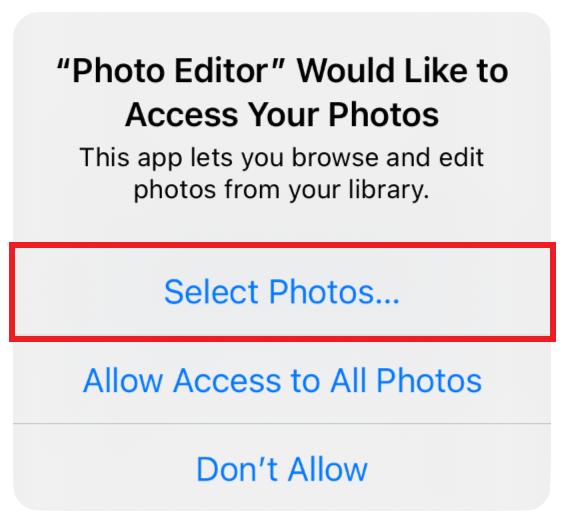
This Select Photos... option lets the user select the assets to share with your app. The selected items represent the user’s limited library selection, your app can only access these assets.
The authorizationStatus() and requestAuthorization(_😃 methods aren’t compatible with the limited library and return PHAuthorizationStatus.authorized when the user authorizes your app for limited access only.
To determine whether the user has authorized your app for limited access, instead use authorizationStatus(for:) and requestAuthorization(for:handler:).
Contacts
Info.plist
- Add the required NSContactsUsageDescription key to your app’s
Info.plistfile. - The value for this key is a string that describes what your app does with the user’s contacts.
- Your app terminates if you request authorization without this key in the Info.plist file.
Request contacts authorization
You can all the requestAccess(for:completionHandler:) class method of CNContactStore and specify CNEntityType.contacts in the call to request contacts authorization.
swift
import Contacts
func requestAccess() {
    let store = CNContactStore()
    switch CNContactStore.authorizationStatus(for: .contacts) {
        case .notDetermined:
            store.requestAccess(for: .contacts) { granted, error in
                if granted {
                    self.getContacts()
                }
            }
        case .authorized:
            self.getContacts()
        case .denied:
            print("denied")
        case .restricted:
            print("restricted")
        @unknown default:
            print("error")
    }
}
Calendars & Reminders
Your app must obtain permission to access the calendar database and EKEventStore is the app’s way of accessing calendar and reminder data.
- You can request write-only access to events, which lets your app create new events but doesn’t let it read any events or other calendar information, including events your app created.
- You can also request full access to either events or reminders, which lets your app create, view, edit, and delete data.
- Your app can’t request read-only access to either events or reminders. To read events or reminders from the event store, your app needs full access.
Info.plist
If your app links to iOS 10 or later, and runs on iOS 10 through iOS 16 and wants to access a person’s calendar events or reminders through EventKit or EventKit UI, your app needs to include descriptions for the following:
| Usage key | Required when: |
|---|---|
| NSCalendarsUsageDescription | The app requests write-only or full access to events. |
| NSRemindersUsageDescription | The app requests full access to reminders. |
| NSContactsUsageDescription | EventKit UI may need to access Contacts data to choose the correct display name or avatar for a contact in a calendar. |
WARNING
If your app that’s linked on iOS 10 through iOS 16 doesn’t include these keys, your app crashes.
On iOS 17 and later, to access a person’s calendar events or reminders, you need to include descriptions for:
| Usage key | Required when: |
|---|---|
| NSCalendarsWriteOnlyAccessUsageDescription | The app requests write-only access to events. |
| NSCalendarsFullAccessUsageDescription | The app requests full access to events. |
| NSRemindersFullAccessUsageDescription | The app requests full access to reminders. |
TIP
On iOS 17 or later, if your app doesn’t include usage description keys, or only includes the older NSCalendarsUsageDescription key for describing events access, iOS automatically denies any access request.
Request access to events or reminders
swift
import EventKit
// Initialize the store.
var store = EKEventStore()
// Request full access to reminders.
store.requestFullAccessToReminders { granted, error in
    // Handle the response to the request.
}

// Request full access to events
store.requestFullAccessToEvents { granted, error in
    // Handle the response to the request.
}

// Request access to events
store.requestWriteOnlyAccessToEvents { granted, error in
    // Handle the response to the request.
}
App Tracking Transparency (ATT) and advertisingIdentifier
Info.plist
If your app calls the App Tracking Transparency API, you must provide custom text, known as a usage-description string, which displays as a system-permission alert request. The usage-description string tells the user why the app is requesting permission to use data for tracking the user or the device.
| Usage key | Required when: |
|---|---|
| NSUserTrackingUsageDescription | The app calls the App Tracking Transparency API. |
For example: 
Request ATT Permission
You can call requestTrackingAuthorization(completionHandler:) to present the app-tracking authorization request to the end user.
swift
import AppTrackingTransparency
ATTrackingManager.requestTrackingAuthorization { (status) in
  switch status {
  case .denied:
      print("ATTrackingManagerAuthorizationStatus is denied")
  case .notDetermined:
      print("ATTrackingManagerAuthorizationStatus is notDetermined")
  case .restricted:
      print("ATTrackingManagerAuthorizationStatus is restricted")
  case .authorized:
      print("ATTrackingManagerAuthorizationStatus is authorized")
  @unknown default:
      print("Invalid ATTrackingManagerAuthorizationStatus")
  }
}
Bluetooth
Info.plist
| Usage key | Required when: |
|---|---|
| NSBluetoothAlwaysUsageDescription | iOS 13 and later,. |
| NSBluetoothPeripheralUsageDescription | Earlier than iOS 13 |
Speech Recognition
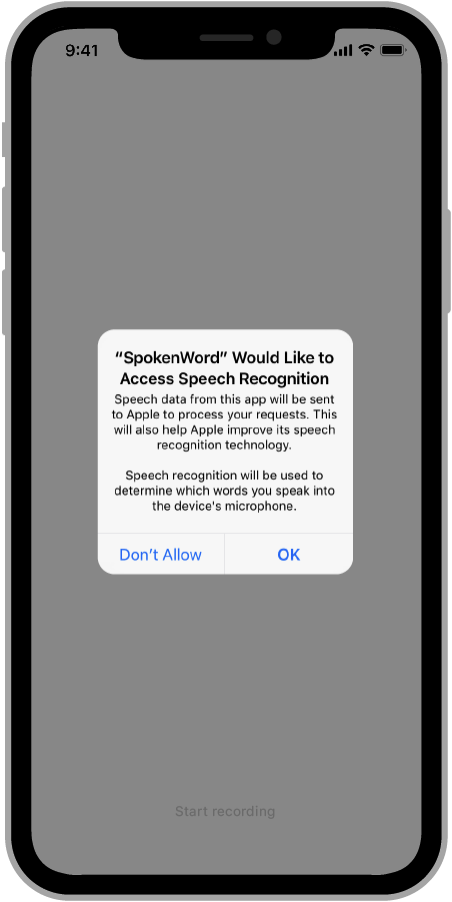
The speech recognition process involves capturing audio of the user’s voice and sending that data to Apple’s servers for processing.
You must also obtain the user’s permission before sending that data across the network to Apple’s servers. You request authorization using the APIs of the Speech framework.
Info.plist
In Xcode, add the NSSpeechRecognitionUsageDescription key to your app’s Info.plist file.
WARNING
You must include the NSSpeechRecognitionUsageDescription key in your app’s Info.plist file. If this key is not present, your app will crash when it attempts to request authorization or use the APIs of the Speech framework.
Request Speech Recognition Authorization
Before using the APIs of the Speech framework, you must call requestAuthorization(_😃 on the SFSpeechRecognizer object.
The following code shows the authorization request for an app that transcribes spoken phrases and displays them onscreen.
swift
import Speech

override public func viewDidAppear(_ animated: Bool) {
   // Configure the SFSpeechRecognizer object already
   // stored in a local member variable.
   speechRecognizer.delegate = self


   // Make the authorization request
   SFSpeechRecognizer.requestAuthorization { authStatus in


   // The authorization status results in changes to the
   // app’s interface, so process the results on the app’s
   // main queue.
      OperationQueue.main.addOperation {
         switch authStatus {
            case .authorized:
               self.recordButton.isEnabled = true


            case .denied:
               self.recordButton.isEnabled = false
               self.recordButton.setTitle("User denied access
                           to speech recognition", for: .disabled)


            case .restricted:
               self.recordButton.isEnabled = false
               self.recordButton.setTitle("Speech recognition
                       restricted on this device", for: .disabled)


            case .notDetermined:
               self.recordButton.isEnabled = false
               self.recordButton.setTitle("Speech recognition not yet
                                      authorized", for: .disabled)
         }
      }
   }
}
HomeKit
Apps that integrate with HomeKit can securely connect to a user’s home automation network and access compatible accessories.
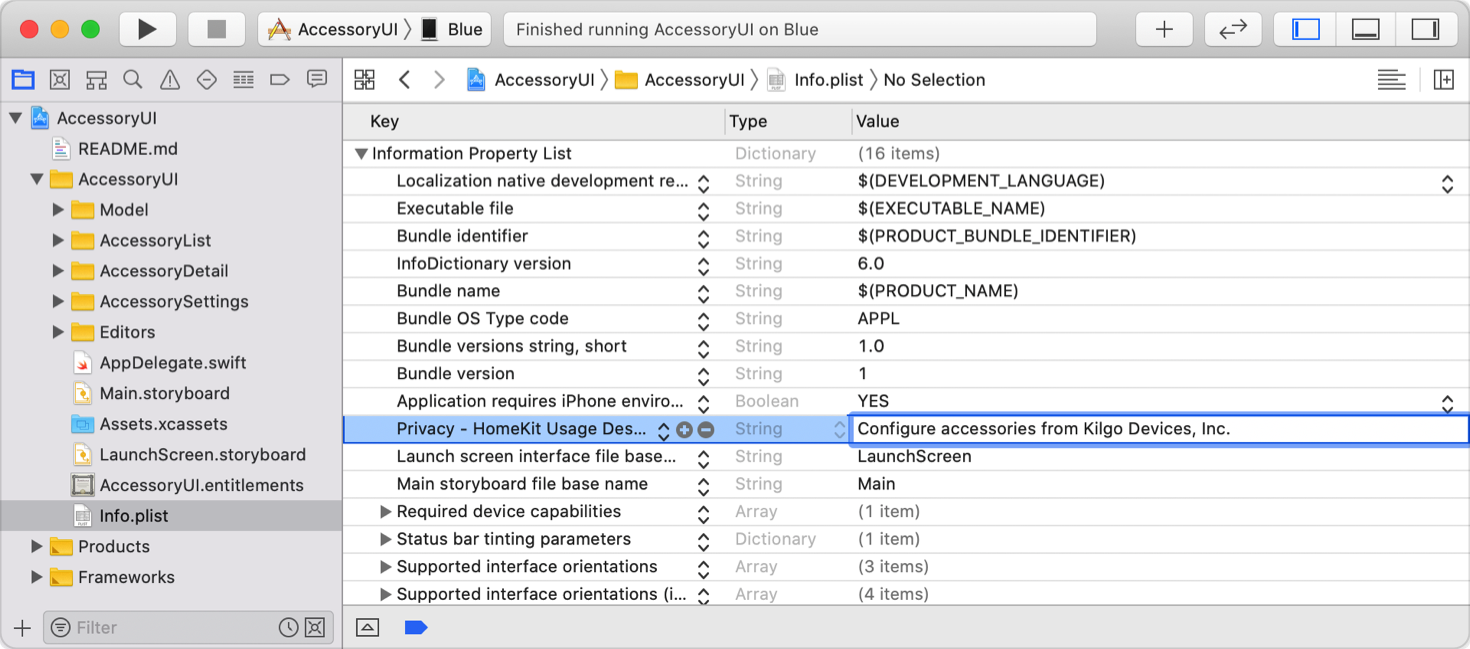
To enable your app to control the user’s compatible accessories, you must add the HomeKit capability to your app’s target and include a short description of the app’s functionality in its target’s Info.plist file.
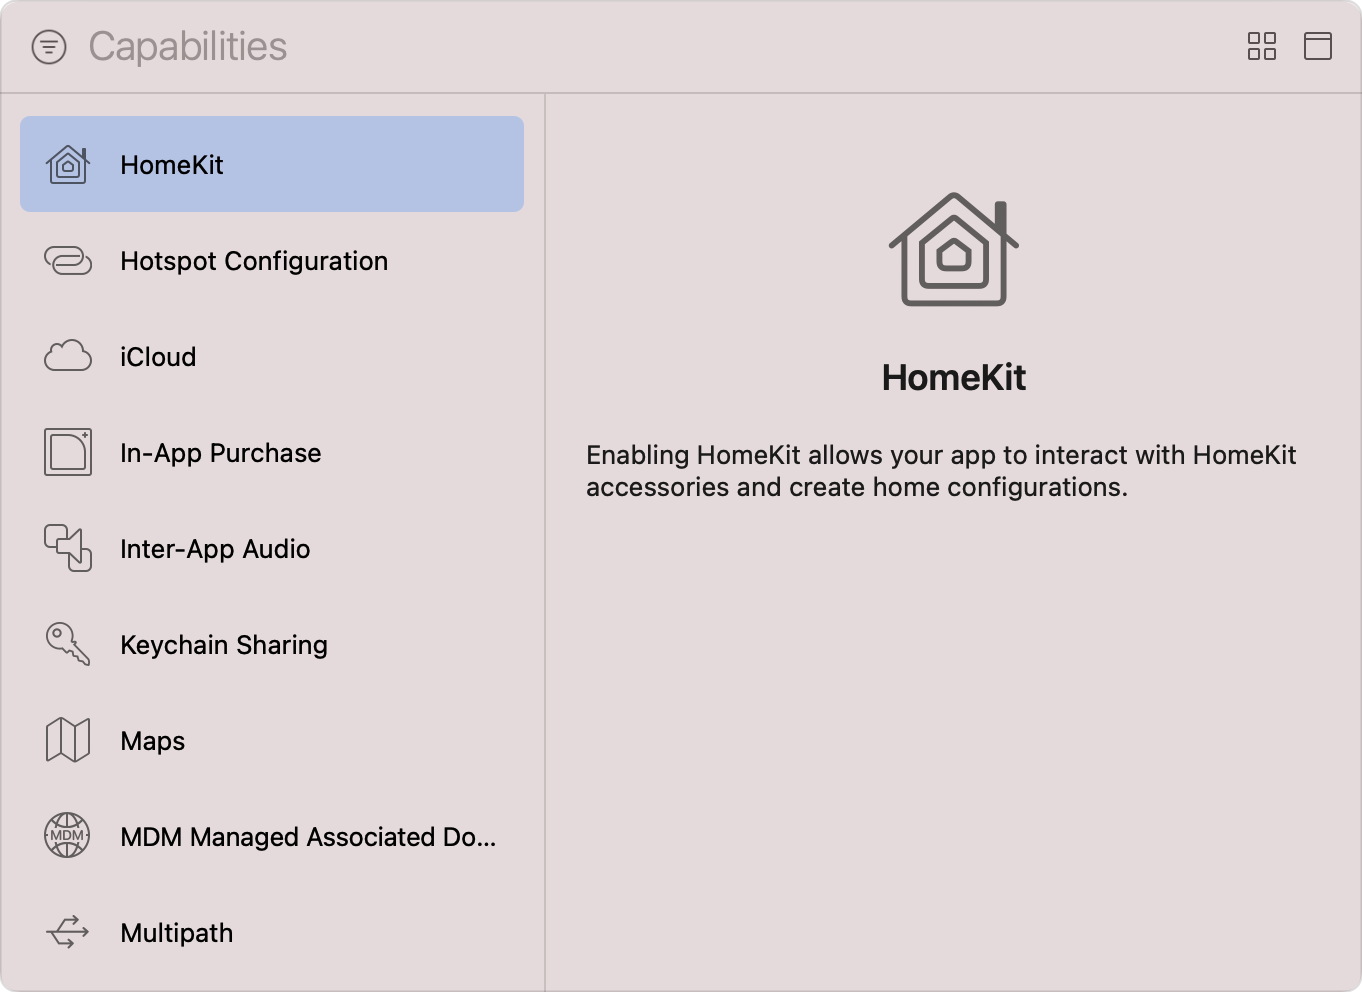
Add the HomeKit capability
Open your project, select the app target, and choose the Signing & Capabilities pane. Then click the + button. In the window that appears, choose HomeKit.
Info.plist
The App Store requires your app to include a purpose string, which accurately and concisely describes the reasons the app needs access to the user’s network. The system displays this information to the user when requesting their permission, which helps them make an informed decision.
| Usage key | Required when: |
|---|---|
| NSHomeKitUsageDescription | This key is required if your app uses APIs that access the user’s HomeKit configuration data. |
WARNING
Apps that enable Homekit but don’t include a purpose string crash when attempting to use the framework’s APIs.
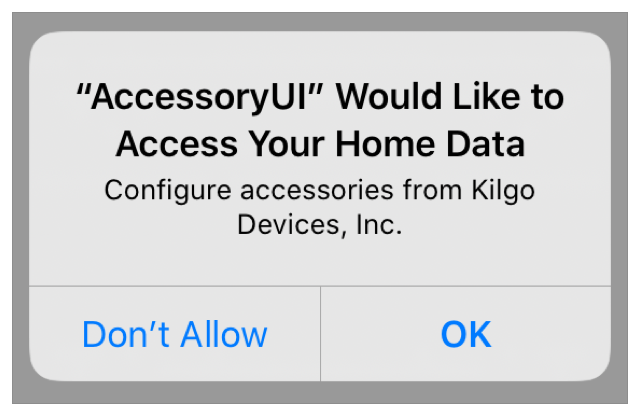
Request access to a home automation network
The system prompts the user for their permission the first time your app uses the HomeKit framework, which is when you initialize HMHomeManager.
References
- Requesting authorization to use location services
- Asking permission to use notifications
- Requesting authorization to capture and save media
- AVCaptureDevice requestAccess(for:completionHandler:)
- Delivering an Enhanced Privacy Experience in Your Photos App
- Requesting authorization to access contacts
- Accessing the event store
- App Tracking Transparency
- Asking Permission to Use Speech Recognition
- Configuring HomeKit access
- Enabling HomeKit in your app