Appearance
Migrate MySQL Database to TiDB Serverless Cloud via MySQL CLI
Step 1: Connect to your TiDB Cloud cluster
- Navigate to the Clusters page, and then click the name of your target cluster to go to its overview page.
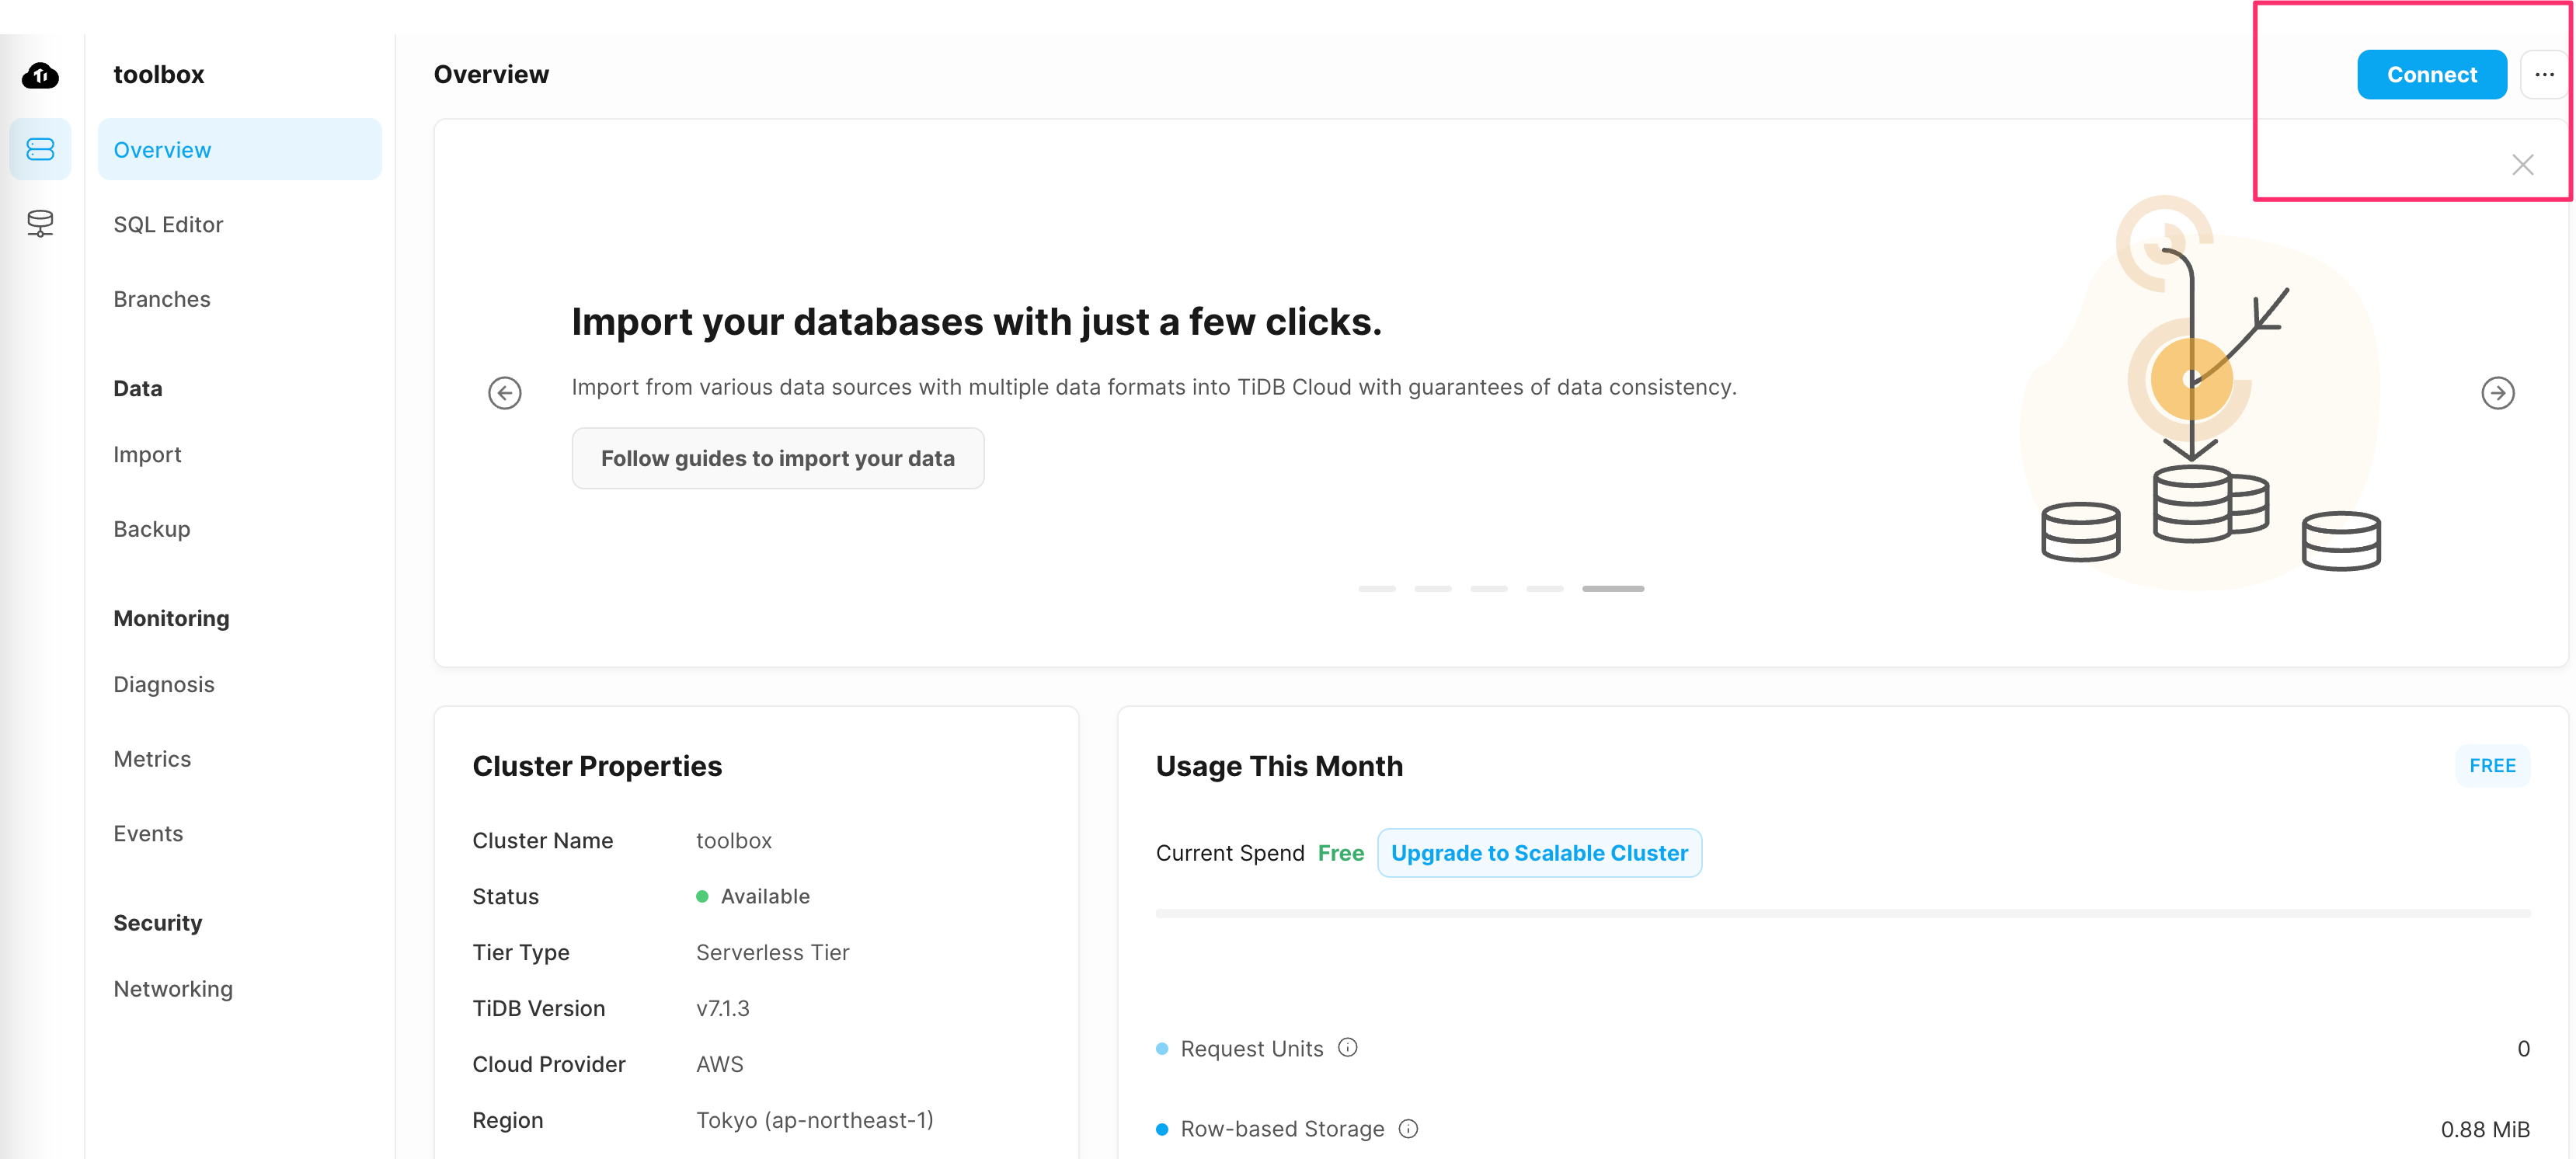
Click Connect in the upper-right corner. A connection dialog is displayed.
Ensure the configurations in the connection dialog match your operating environment.
- Endpoint Type is set to
Public. - Connect With is set to
MySQL CLI. - Operating System matches your environment. In my case, it's macOS.
- Endpoint Type is set to
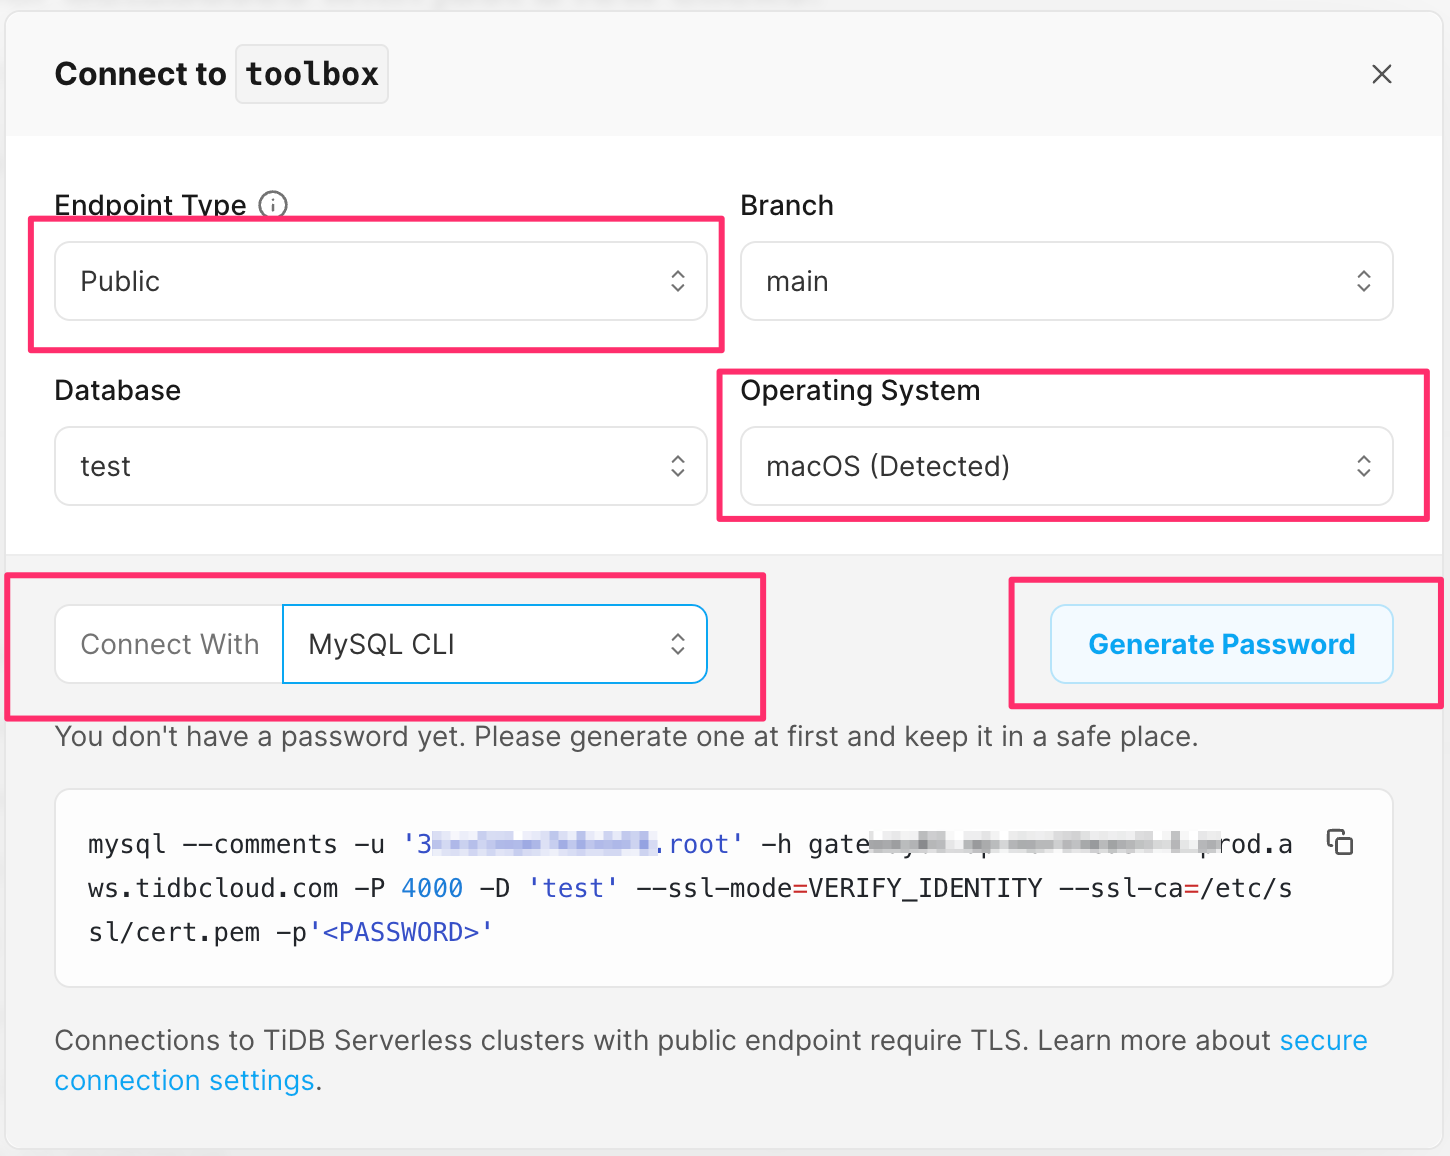
- Click Generate Password to create a random password.
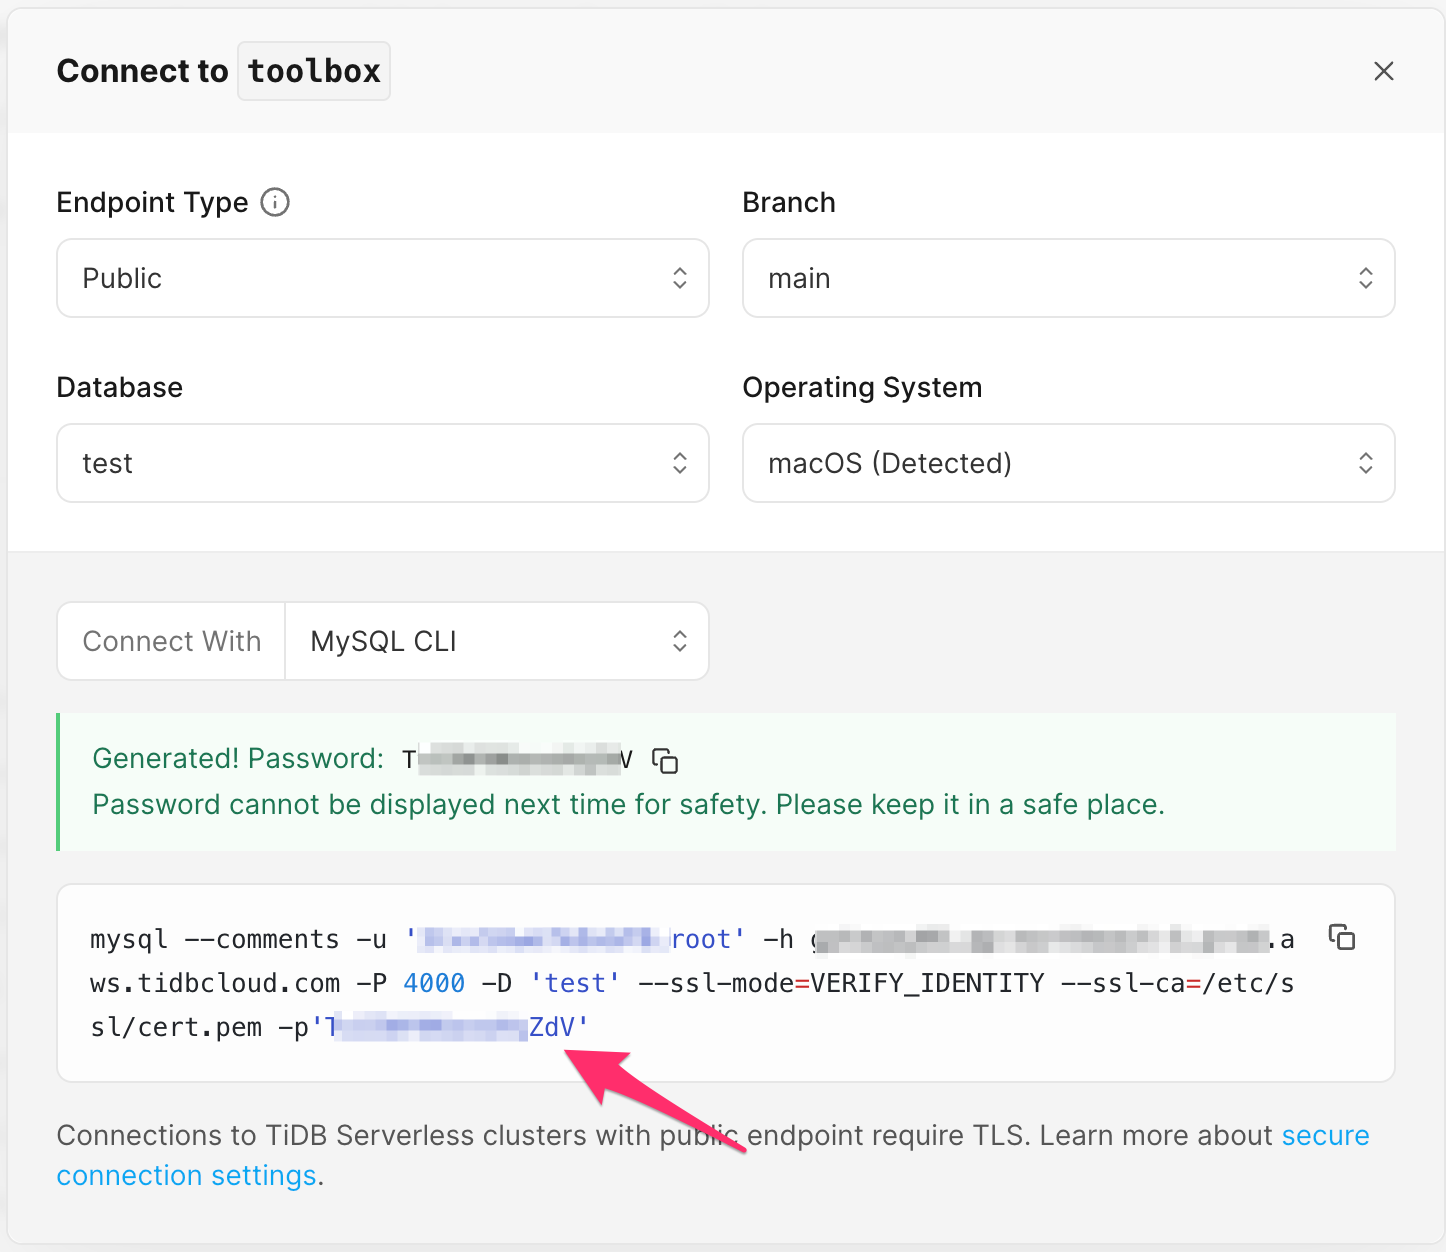
From this dialog, you can get the TiDB hostname,username,password. These can be used to connect to TiDB using MYSQL CLI.
TIP
If you have created a password before, either use the original password or click Reset Password to generate a new one.
Step 2: Create the Same Database Name in TiDB Cloud Cluster
- Login to the TiDB Cloud Cluster using the command from step1.
shell
$ mysql -u '<tidb_username>'' -h <tidb_hostname> -P 4000 -p'<tidb_password>'- Create a database in the TiDB Cloud cluster
shell
mysql> create database <your_dbname>;Step 3: Export Data from MySQL Database to SQL file
shell
$ mysqldump --single-transaction --set-gtid-purged=OFF -h <your_mysql_host> -P 3306 -u <your_username> -p<your_password> <your_dbname> database_backup.sqlStep4: Import SQL file to TiDB Cloud Cluster
shell
mysql -u '<tidb_username>'' -h <tidb_hostname> -P 4000 -D <your_dbname> -p'<tidb_password>' < database_backup.sqlYou may encounter an error:
Unsupported collation when new collation is enabled: 'utf8mb4_0900_ai_ci'
In this case, you can replace the utf8mb4_0900_ai_ci to utf8mb4_bin in the SQL file using sed.
shell
sed -i '' "s/utf8mb4_0900_ai_ci/utf8mb4_bin/g" database_backup.sqlThen, execute the migrate command again.
INFO
Before TiDB v7.4.0, if your client uses utf8mb4_0900_ai_ci as the connection collation, TiDB falls back to using the TiDB server default collation utf8mb4_bin because TiDB does not support the utf8mb4_0900_ai_ci collation.
Starting from v7.4.0, if your client uses utf8mb4_0900_ai_ci as the connection collation, TiDB follows the client's configuration to use utf8mb4_0900_ai_ci as the default collation.